The Editor Panel is the central interface for editing pages in Capuzzella. It's where you describe changes in natural language, reference design system components, upload media, and manage your page's lifecycle — all without writing a single line of code. This guide covers everything the Editor Panel can do and how to use it effectively.
Opening the Editor Panel
Append ?edit=true
to any page URL to enter edit mode. The Editor Panel slides in on the right side of the
screen, showing the page name at the top along with its publish status. The left side of
the screen continues to show the live page, so you always see the result of your edits in
real time.
AI Chat: Editing Pages with Natural Language
At the bottom of the Editor Panel is a chat input with the placeholder "Describe changes, use @ for context". This is where you talk to the AI. Type what you want to change, click Build page, and the AI rewrites the page HTML accordingly. The page preview on the left updates immediately.
The AI understands the full context of the page it's editing. It sees the current HTML, your
design system components, and any additional context you attach via @ mentions.
This means your instructions can be high-level:
- "Add a testimonials section below the hero with three customer quotes"
- "Change the headline to 'Enterprise Solutions' and update the subtext to match"
- "Replace the contact form with a simpler version that only has name and email"
- "Make the feature cards use icons instead of images"
You can also be specific about layout, styling, or Bootstrap classes if you want fine-grained control. The AI preserves the rest of the page when making changes — it only modifies what you ask it to.
The chat maintains conversation history within a session. You can iterate on changes by sending follow-up messages: "Make the cards bigger", "Use a darker background", "Actually, go back to three columns instead of four". Each message builds on the previous state of the page.
Uploading Images and Files
The Editor Panel includes an Upload button next to the Build page button. Click it to upload images, videos, or PDFs directly to your Capuzzella project. Uploaded files are stored in the project's public directory and immediately available for use on any page.
Uploads integrate directly with the AI chat. After uploading an image, you can reference it in your prompt: "Add the uploaded team photo to the About section". The AI knows which files are available and can insert them with the correct path.
Supported file types include common image formats (JPEG, PNG, GIF, WebP, SVG), video formats, and PDF documents.
Referencing Components with @
The AI automatically has access to your design system and can load components on its own
when it determines they're relevant. But sometimes you want to be explicit about which
component the AI should use. That's where @ mentions come in.
Type @ in the chat input and a context menu appears, listing all available
components from your design system. The menu is divided into two sections:
Components (from the components/ directory) and
Pages (your existing site pages). Scroll through the list or keep typing
to filter results.
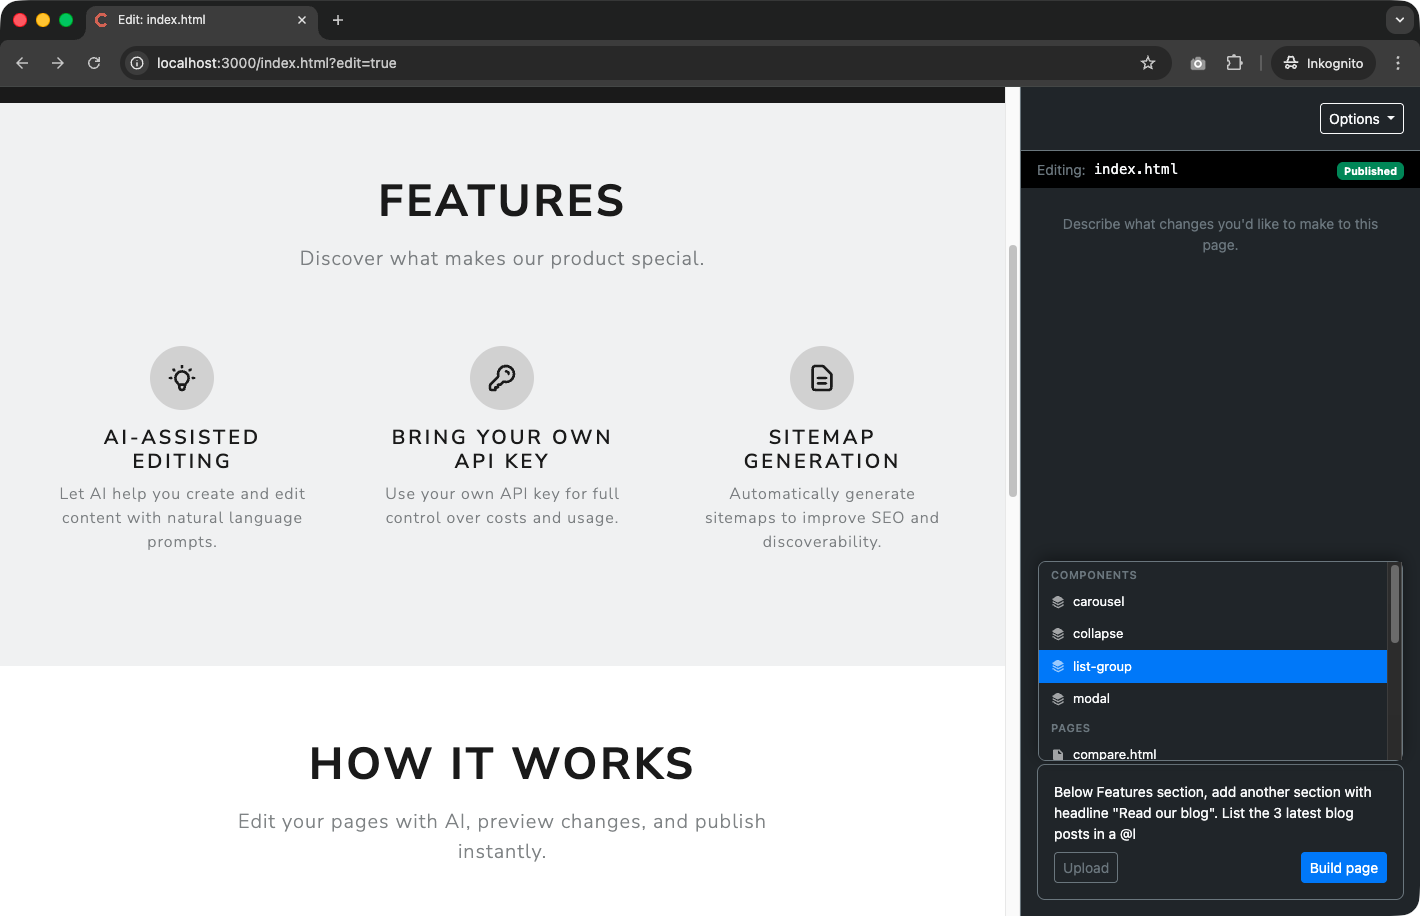
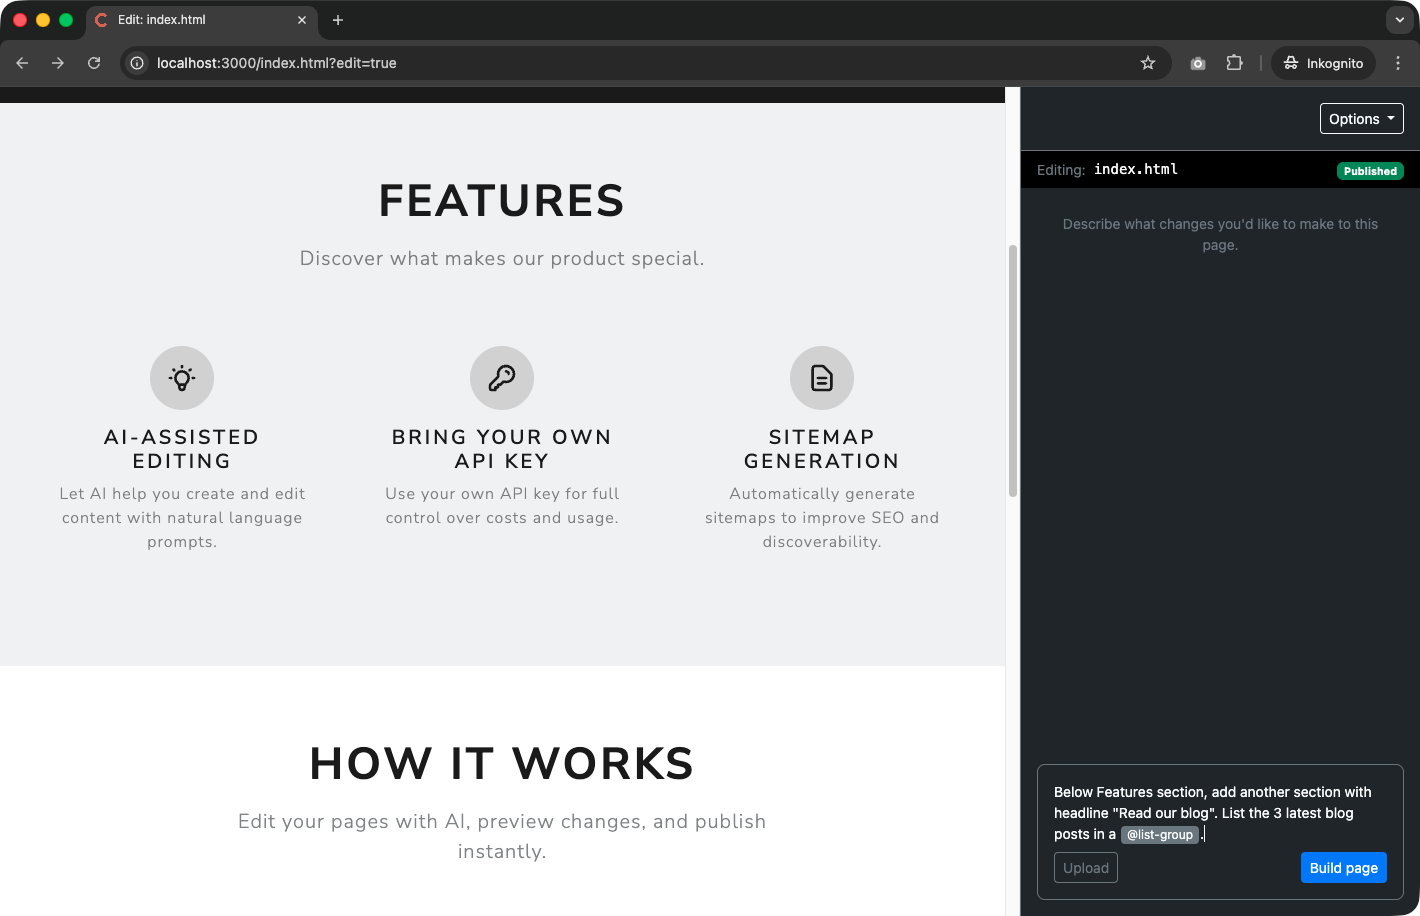
When you select a component — say, @list-group — it appears as a styled badge in the chat input. Behind the scenes, the system loads the full HTML template for that component and attaches it to your message as context. The AI then uses that exact markup as its blueprint when generating the page update.
You can attach multiple components in a single message. For example:
Chat input:
"Below Features section, add another section with headline 'Read our blog'. List the 3 latest blog posts in a @list-group"
This gives you precise control over which design system patterns the AI follows, while still letting the AI handle the actual implementation. You describe what you want and which component to use; the AI figures out the HTML.
Referencing Other Pages with @
The @ context menu doesn't just list components — it also shows all
pages on your site under the Pages section. Select a page to attach its
HTML as context for the AI.
This is useful in several scenarios:
- Match a layout. Reference an existing page and tell the AI to "Create a new page with the same structure as @about.html"
- Pull content. Ask the AI to "Add links to the latest posts from @blog/index.html"
- Ensure consistency. Reference another page so the AI can match its tone, section order, or navigation pattern
The AI receives the full HTML of the referenced page, so it can inspect every detail — headings, classes, layout structure, content — and apply whatever aspects you ask it to.
The Options Dropdown
In the top-right corner of the Editor Panel sits the Options dropdown. It provides quick access to page management actions without leaving edit mode.
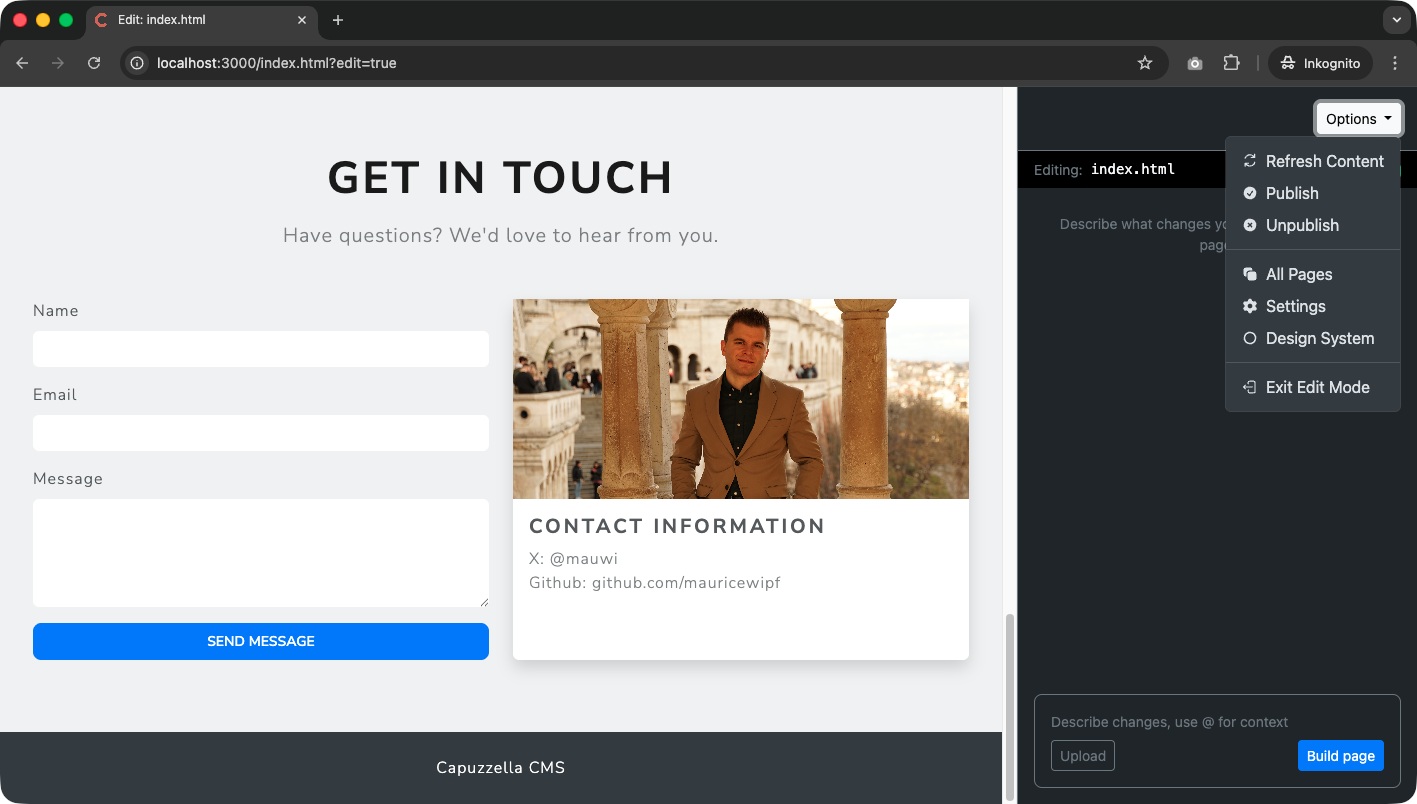
The dropdown includes the following actions:
- Refresh Content — Reloads the page content in the editor, useful if changes were made elsewhere or you want to discard uncommitted AI edits
- Publish — Publishes the current draft to make it live. One click and your changes are visible to visitors
- Unpublish — Removes the page from the public site while keeping the draft intact for future editing
- All Pages — Opens a list of every page on your site for quick navigation between pages
- Settings — Opens the project settings where you can configure your API key, site metadata, and other preferences
- Design System — Opens the
/design-systempage where you can browse all available components rendered with your project's theme - Exit Edit Mode — Leaves the editor and returns to the normal page view
Putting It All Together
The Editor Panel is designed to keep everything within reach. A typical editing session might look like this:
-
Navigate to a page and append
?edit=trueto the URL -
Type a prompt describing what you want to change, using
@to reference components or other pages as needed - Upload any images the AI should use, then reference them in a follow-up prompt
- Review the result in the live preview on the left, and iterate with additional prompts if needed
- Open the Options dropdown and click Publish to push the changes live
No code editor. No FTP. No deploy pipeline. Just describe what you want, see it happen, and publish.